Home Remodeling Princeton NJ is a great opportunity to make your house a true reflection of yourself. It also increases comfort by addressing issues such as air flow, moisture and temperature.

Remodeling can also increase your home’s market value. This is because people are drawn to houses that meet their needs and tastes.
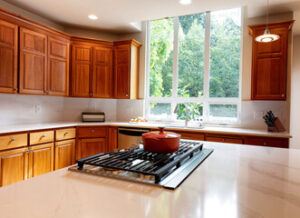
A kitchen remodel is one of the most popular remodeling projects. It allows homeowners to create a space that is both functional and attractive, which can add tremendous value to the home. In fact, prospects often prioritize homes with updated kitchens when touring properties. A professional kitchen remodel should be carefully planned and executed to ensure that the end result meets all of the family’s needs.
The kitchen is the heart of the home, so it makes sense that the most important rooms are the first to be remodeled. In addition to making the most of your existing living space, kitchen remodels can help you to entertain guests and make cooking for a large group easier. Kitchen remodeling can be a time-consuming and expensive project, so it’s vital to have a plan in place before getting started.
There are some homeowners who attempt to undertake their own kitchen remodeling projects, but this can be difficult and time-consuming, especially if you’re not a skilled carpenter or contractor. If you’re considering a kitchen remodel, be sure to work with a licensed, experienced contractor who can provide expert advice and recommendations. A reputable contractor can also ensure that the project is completed in a timely manner and within budget.
A kitchen renovation involves superficial changes that improve the look of the space without altering its structure or layout. These upgrades can include replacing cabinets, appliances, and other fixtures and accessories. It’s a great option for homeowners who want to give their kitchen a fresh, new look without breaking the bank.
Renovating your kitchen can be a rewarding experience, but you need to have a clear idea of what you want before getting started. This will help you to stay on budget and avoid any costly mistakes that could derail your project. It’s also a good idea to shop around for the best prices on materials before making any purchases. Using budget-friendly alternatives to high-end products can save you a significant amount of money.
It’s also a good idea to hire a general contractor for larger remodeling projects. These professionals can coordinate all of the subcontractors and schedules to complete your project on time and within your budget. They can also make sure that all building codes are adhered to and that any required permits are obtained.
Living Room Remodeling
The living room is the central hub of the home, where family members relax and spend time together. Whether your living space is large and open or more intimate, it’s important that the area matches your family’s lifestyle.
Modern home remodeling ideas can help you tailor your space to fit your family’s needs and personal aesthetic. For example, homeowners can create an open concept layout by removing interior non-loading-bearing walls to connect the living room to other spaces in their home. This can allow for more light and air to flow through the space, and create a larger sense of openness.
Another way to update your living room is to replace your windows with new energy-efficient ones. Not only will new windows improve the look of your living space, but they’ll also increase energy efficiency, reduce noise, and lower your utility bills. Lastly, new window treatments can add an extra layer of privacy to your living room and complement the style of your home.
Incorporating stylish accents can also give your living space a modern makeover. Rugs, pillows, and artwork are great places to start and can easily be changed out when you want to change the look of your room. For lighting, try installing recessed or track lights for a clean, streamlined look. You can also add decorative lamps to bring in a touch of personality.
Regardless of what kind of remodel you are looking to do, it’s a good idea to consult with a professional and have some budgetary flexibility in mind. It’s also helpful to talk to friends and neighbors about their experiences with their own home remodeling projects to get ideas.
A full renovation is an extensive project that can involve changes to walls, flooring, and ceilings. It can be costly but will give your living space a brand-new look and feel. A partial renovation, on the other hand, involves replacing only some elements of your living space. It’s usually a cheaper option and can be done over the course of several months or even years.
Keep in mind that your living space will likely be used throughout several stages of your life. If you have children, you may want to consider how your design plans will affect their safety and comfort as they grow up in the house. Similarly, if you plan to sell your home in the future, consider how your remodeling work will impact your return on investment.
Bedroom Remodeling
The bedroom is a personal retreat that should be comfortable and inviting. Whether you want to upgrade aesthetics or add functionality, there are plenty of remodeling options that can help. Some upgrades provide a higher return on investment than others, so it’s important to focus on elements that contribute to better sleep and relaxation.
One of the most popular upgrades for bedrooms is new flooring. Hardwood or laminate floors are a great option for homeowners who want to increase comfort and resale value. Other popular flooring choices include refinishing existing wood floors, installing carpet, and adding rugs.
Another way to increase comfort in the bedroom is through energy-efficient upgrades. New windows and doors, lighting, and insulation are all good choices that can boost your home’s energy efficiency while lowering monthly utility bills. These upgrades may cost more upfront, but they will pay off when it comes time to sell your home.
Adding storage is also an excellent upgrade for bedrooms. Upgrading to a walk-in closet or a built-in storage solution can help you get rid of clutter and make the space feel more open and welcoming. If you don’t have the space or budget for a full remodel, simple upgrades like a new bedside table and fresh decor can also make a big difference.
You can even turn your bedroom into a personal work space by adding a sitting area or window seat. These spaces are perfect for reading, writing, or working on projects that require a little more privacy than a regular desk. A custom-built sitting area can be a more expensive upgrade than other bedroom remodels, but it’s sure to add value to your home and create a space that you will enjoy.
Before you begin any remodeling, it’s a good idea to draw out a floor plan of the space. This will help you plan where furniture should go and ensure that any new pieces will fit well in the room. It’s also a good idea to consider reusing items from your existing bedroom to save money on the project. For example, an old dresser can be painted or reupholstered to give it a new look.
Bathroom Remodeling
Bathrooms are one of the most used areas in a home, so they require frequent maintenance and upgrades. Remodeling your bathroom can make it look refreshed and new while adding value to your house at the same time.
Whether you’re renovating your entire bathroom or just updating its appearance, careful planning is crucial. Avoiding common pitfalls will save you money and headaches in the long run. For example, skimping on ventilation could lead to mold and mildew problems. Or a poorly executed storage solution can result in a messy room that detracts from the overall look.
When planning a bathroom remodel, start by creating a visual guide to help you visualize your vision. This can be as simple as a Pinterest board or collecting pictures of bathrooms that inspire you. Next, determine what’s important to you in your bathroom, such as storage solutions, the position of the tub or shower, and finishing touches like a new mirror. Finally, decide on your budget and stick to it! It’s also a good idea to set aside 5-10% of your budget for unforeseen expenses.
The cost of a bathroom remodel depends on several factors, including the size and scope of the project, materials, labor costs, and more. For example, larger bathrooms and significant layout changes typically require more work, resulting in higher remodeling costs. Additionally, some materials, such as imported ceramic tiles, may need longer drying times, which can extend the duration of your bathroom renovation.
A full bathroom remodel involves expanding the footprint of your existing bathroom, removing or moving walls, and even installing new windows. This is a major undertaking that requires the expertise of a professional contractor. It’s also a good idea to consult with an architect or interior designer to create a cohesive design and ensure the finished product is up to code.
A retrofit is a less expensive remodeling option that replaces existing elements such as the bathtub or shower. This is a great choice for small bathrooms that don’t need major structural changes.